User management
Control panel provides full access to user management and data. After login to Control panel you will see user list page. It allows to add/edit users, view user activity, set privileges, control sub accounts and more.
User list
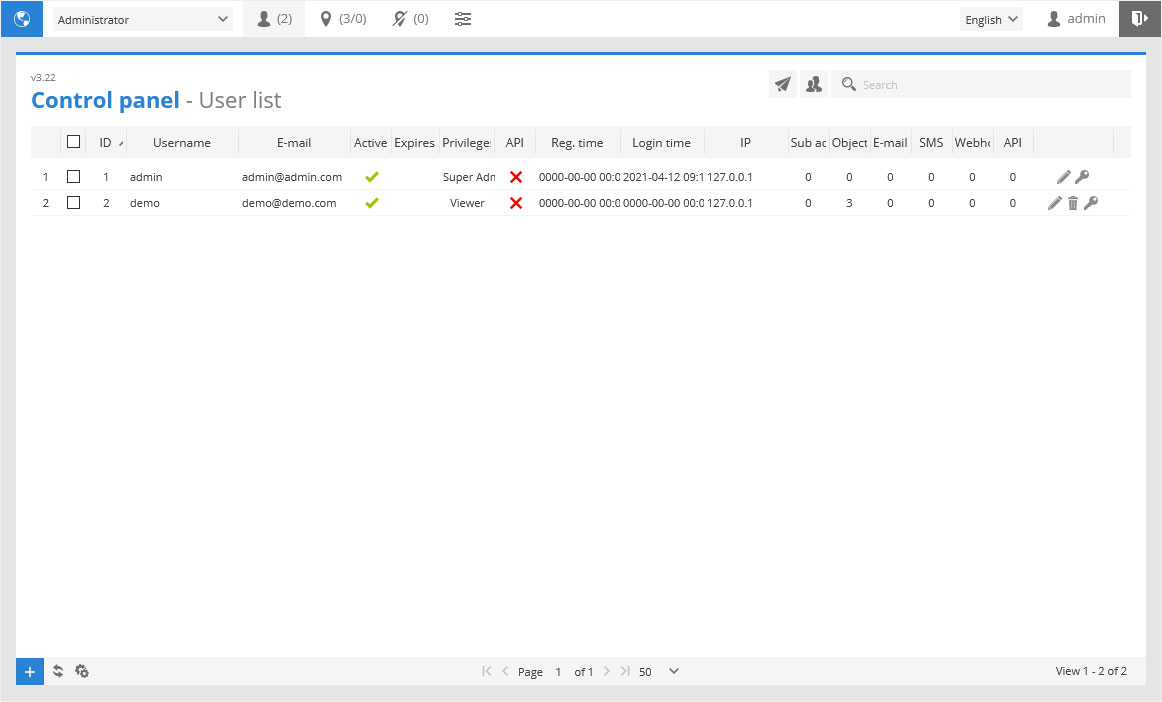
![]() edit - change object settings.
edit - change object settings.![]() remove - permanently removes object.
remove - permanently removes object.![]() login as user - directly login to user account.
login as user - directly login to user account.
To process multiple entries do next:
- Mark entries by clicking checkbox on the left.
- Proceed action in
 action menu located at the bottom of settings window.
 - Choose option
 Activate,
  Deactivate,
  Set expiration,
  Import or
  Delete.
 - Confirm action which will be applied to all selected entries.
Objects can be imported using CSV file. To import objects, do next:
- Press action menu button located at the bottom of window.
- Choose option Import.
- Choose CSV file and confirm action.
CSV example:
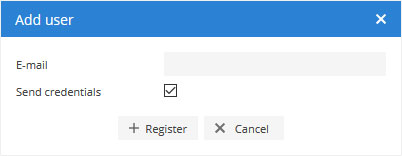
Add user
To add new user do next:
- In user list page left bottom corner press
 button.
 - Add user window will appear.
- Enter user e-mail and mark send credentials (if needed).
- Press Register.
Edit user
To edit user data do next:
- In user list page choose object to edit and click
 edit icon on the right side.
 - Edit user window will appear.
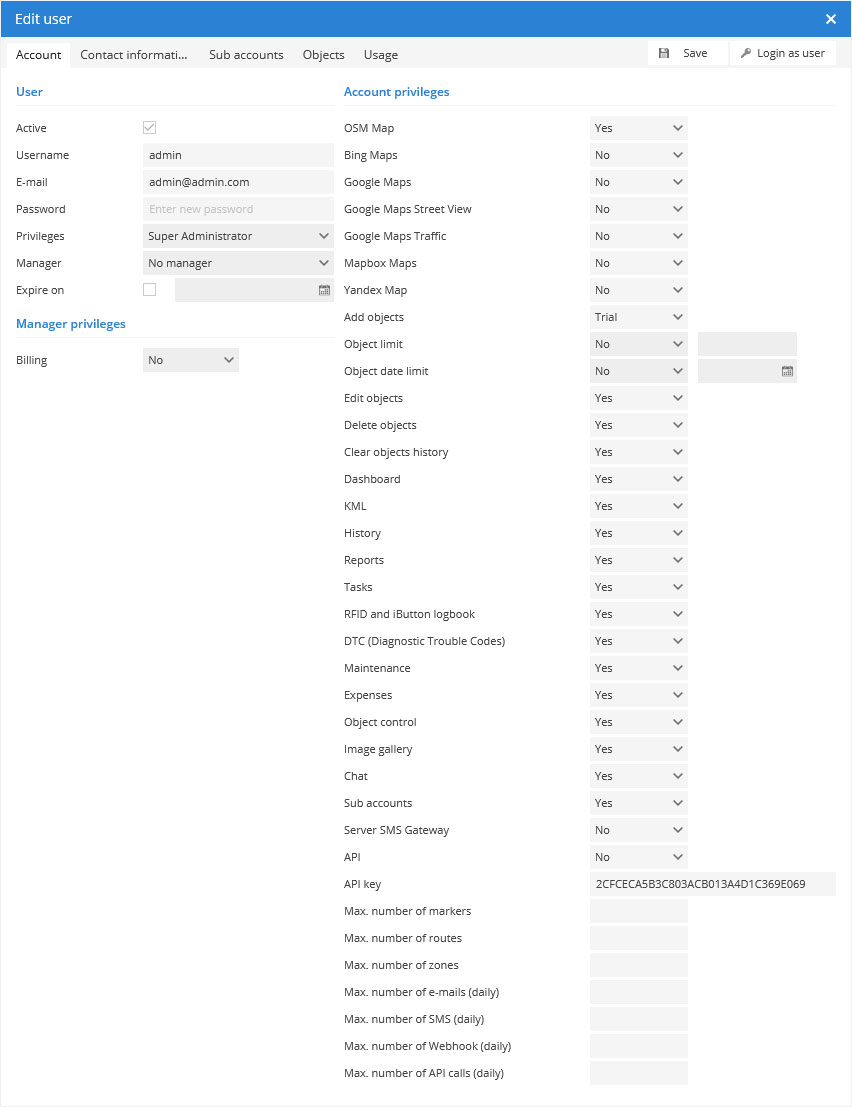
User account
This section keeps all user account settings and private data.
User
- Active - allows to activate/deactivate user.
- Username - user username.
- E-mail - user e-mail.
- Password - user password.
- Privileges - user rights.
- Viewer - user can only see results without possibility to do any changes in account.
- User - regular user with possibility to manage account on his own.
- Manager - user with manager rights can access other users objects assigned to him (note: this option requires to choose object limit for manager user). To assign object to manager visit object management section. Objects can be assigned to Manager only through Control panel.
- Administrator - can access all available system features except Manage server page.
- Super Administrator - can access all available system features.
- Manager - choose account manager. Note: user with manager rights must be created first!
- Expire on - set account expiration date (if needed). On due date account will become inactive.
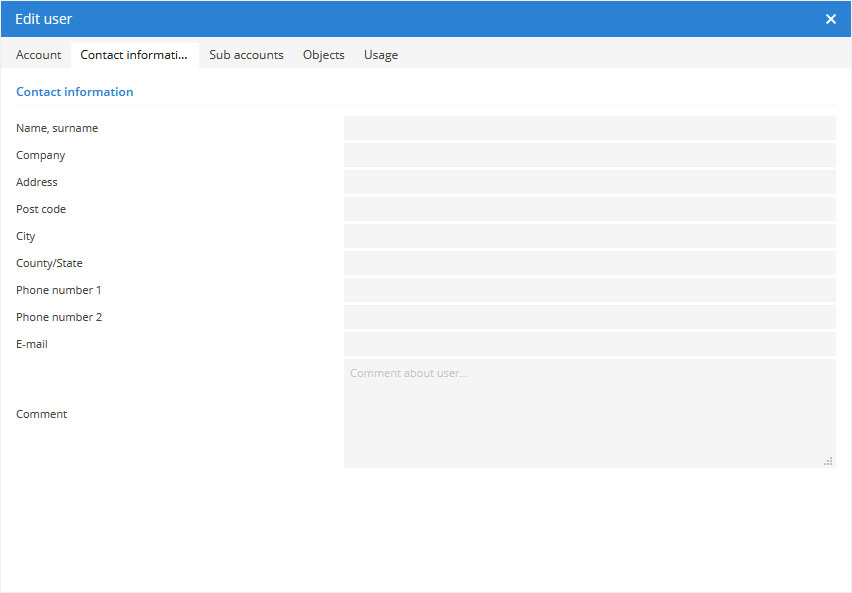
Contact information
Sub accounts
This section allows to manage user sub accounts.

![]() save - save changes.
save - save changes.![]() remove - permanently remove object.
remove - permanently remove object.
To process multiple entries do next:
- Mark objects by clicking checkbox on the left.
- Proceed action in action menu located at the bottom of window.
- Choose option Activate, Deactivate or Delete.
- Confirm action which will be applied to all selected entries.
Dispositivos
This section allows to manage user objects, extend object expiration date, set average date to all objects, view last connection time and status.

![]() edit - change object settings.
edit - change object settings.![]() clear history - removes object Historial and Eventos entries.
clear history - removes object Historial and Eventos entries.![]() remove - permanently remove object.
remove - permanently remove object.
- Name - object name.
- IMEI - object IMEI number.
- Active - allows to activate/deactivate object.
- Active till - object expiration date.
- Last connection - object last connection to server time.
- Status - device connection status.
 Grey icon - no GPRS and GPS
 Orange icon - no GPS signal
 Green icon - GPRS and GPS are OK
To process multiple entries do next:
- Mark objects by clicking checkbox on the left.
- Proceed action in action menu located at the bottom of window.
- Choose option Activate, Deactivate, Set expiration,
 Clear history or Delete.
 - Confirm action which will be applied to all selected entries.
Billing plans
Billing section allows to assign purchased plans to user account, which will be used to activate objects.

![]() edit - change object settings.
edit - change object settings.![]() remove - permanently remove object.
remove - permanently remove object.
To process multiple entries do next:
- Mark entries by clicking checkbox on the left.
- Proceed action in action menu located at the bottom of settings window.
- Choose option Delete.
- Confirm action which will be applied to all selected entries.
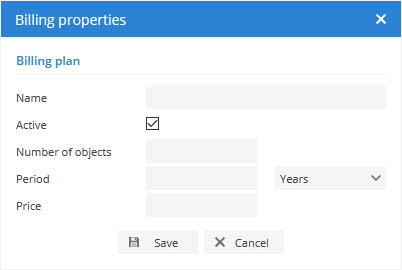
To add new billing plan do next:
- In Billing plans page left bottom corner press button.
- Billing properties window will appear.
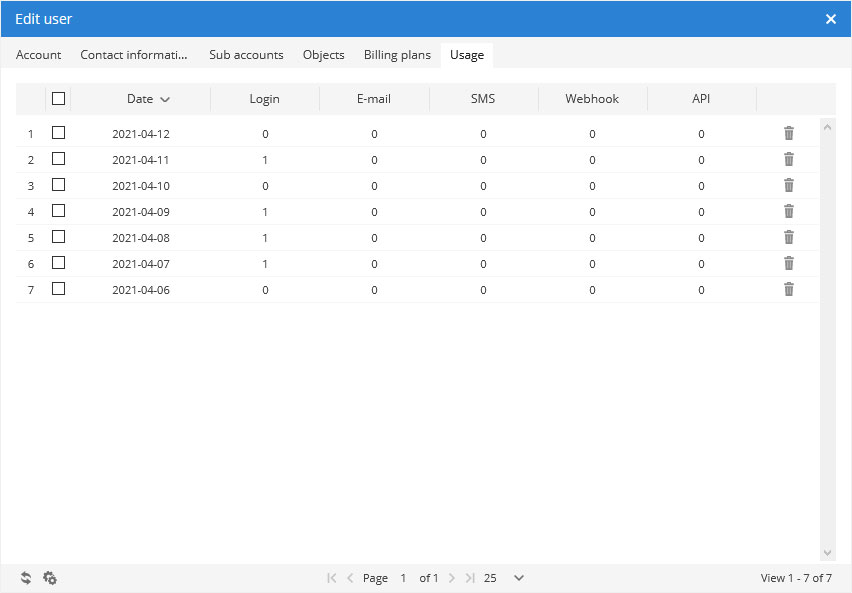
Usage
Usage sections shows statistics of particular account. Amount of logins, sent e-mails and SMS, used API calls.
To process multiple entries do next:
- Mark entries by clicking checkbox on the left.
- Proceed action in action menu located at the bottom of settings window.
- Choose option Delete.
- Confirm action which will be applied to all selected entries.